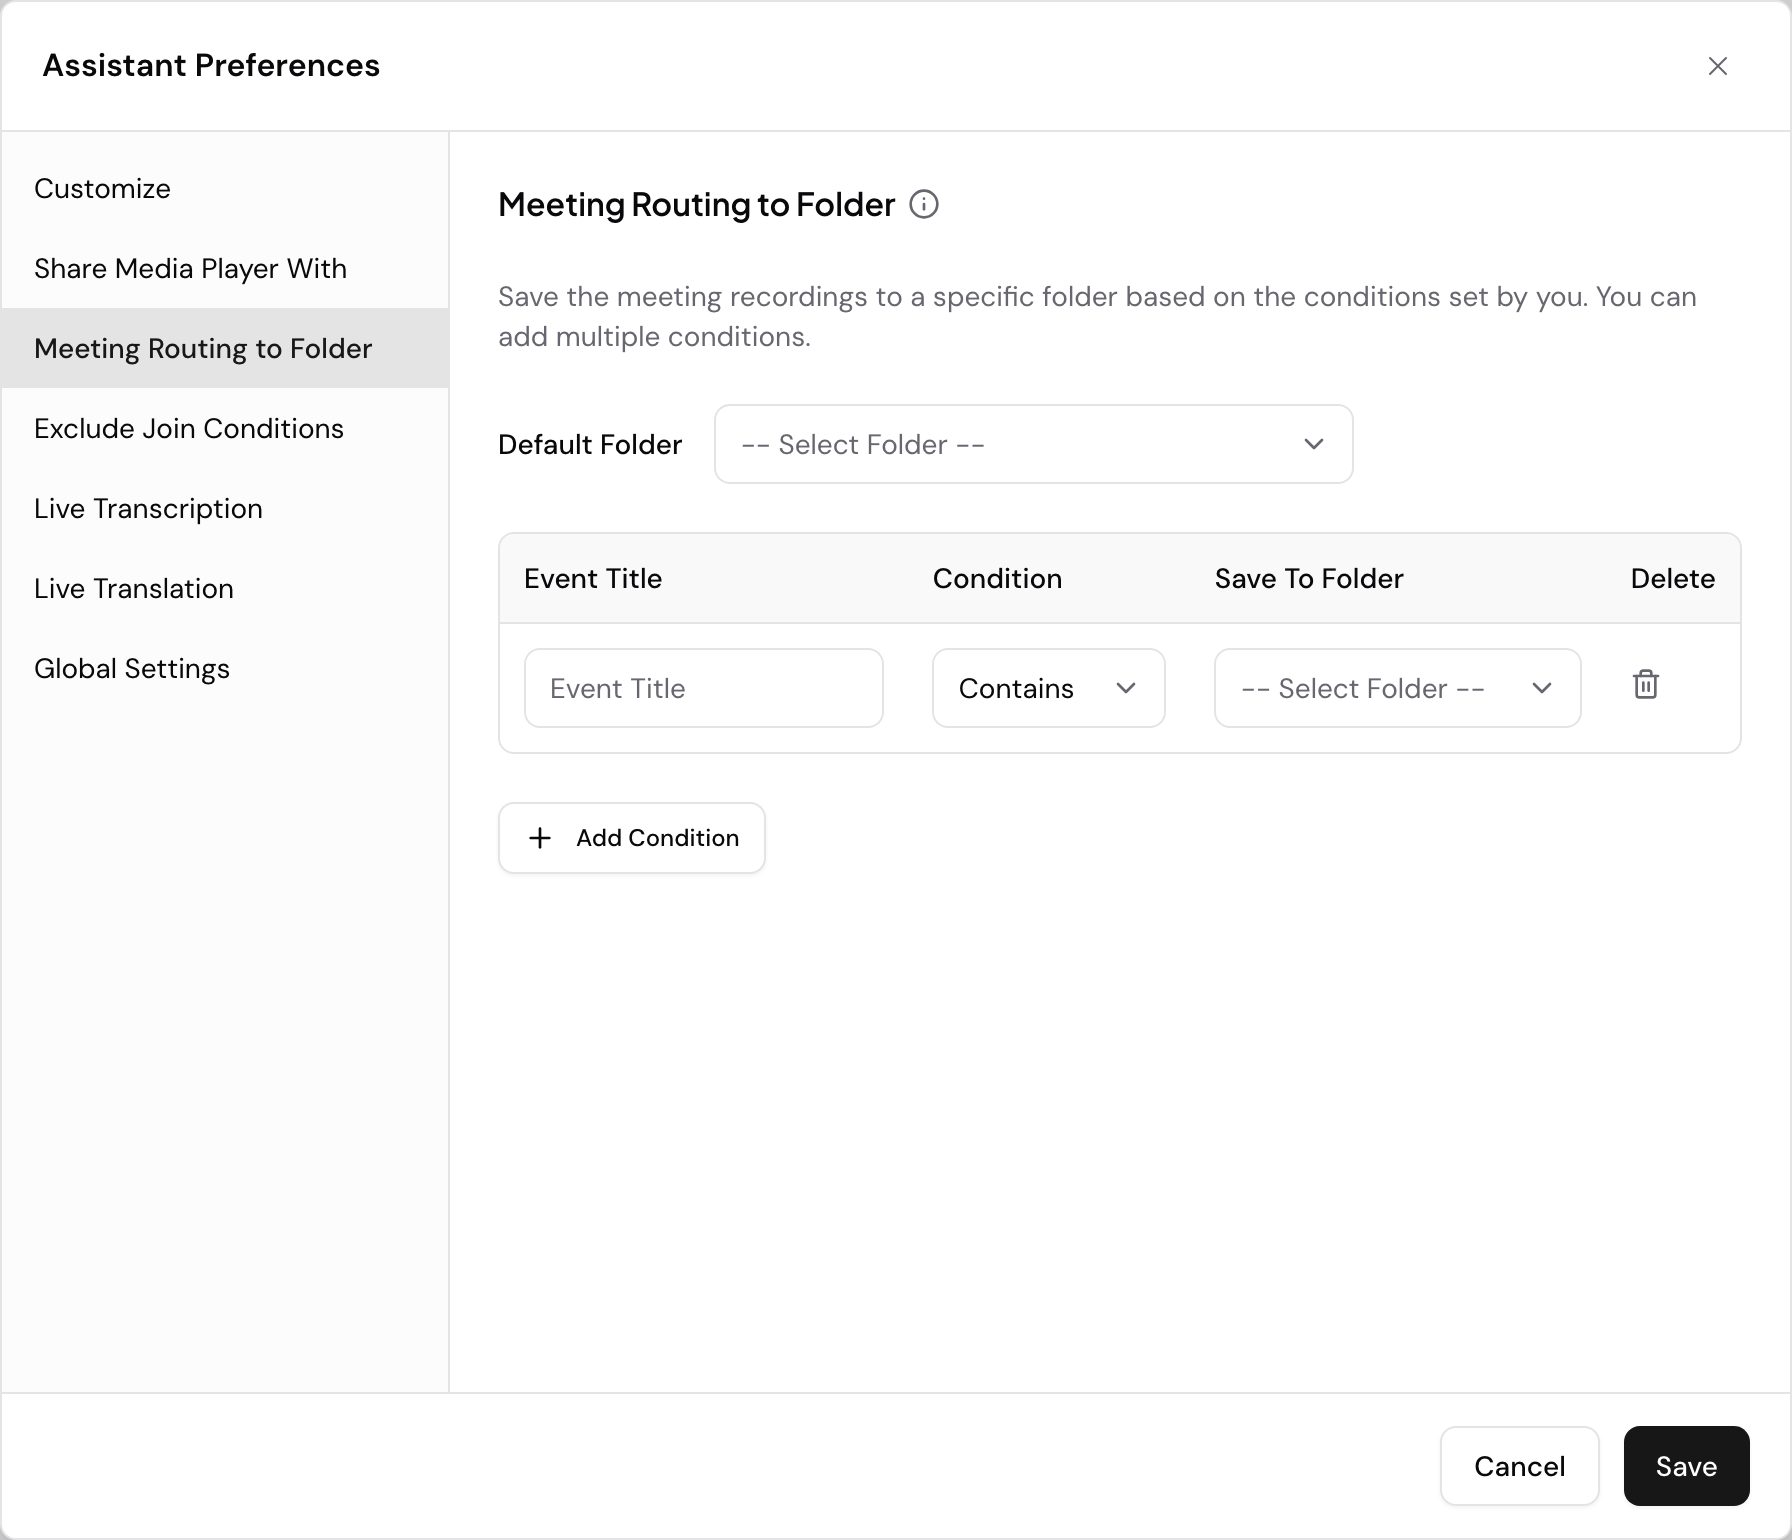
Every recording the Meeting Assistant captures lands in a folder. Set a default so nothing goes stray, add conditions that send particular meetings somewhere more specific, and pick a folder on a single meeting when it belongs somewhere else entirely.
Set the default folder
- Open the Meeting Assistant page.
- Select Assistant Preferences at the top right. A dialog opens.
- Select the Meeting Routing to Folder tab in the left menu.
- Pick a folder from the Default Folder dropdown. Until you choose one it reads
-- Select Folder --. - Select Save.
From then on, the assistant files every recording there unless a condition or a per-meeting choice sends it somewhere else.
Route specific meetings elsewhere
Conditions match on the calendar event’s title, so a recurring call can file itself away from the default. You can add as many as you need.
- On the Meeting Routing to Folder tab, select Add Condition.
- Fill in Event Title with the words to match. Speak suggests your upcoming calendar events as you type, so you can pick one instead of retyping it.
- Set Condition to either Contains or Exact Match. Contains matches any title with those words somewhere in it. Exact Match matches only the title in full.
- Choose the destination in Save To Folder.
- Select Save.
To remove a condition, select the bin icon in its Delete column.
Every condition needs both an Event Title and a Save To Folder value. Speak will not save the tab while either one is empty.
Pick a folder for one meeting
The Meeting Assistant files a single meeting wherever you choose when you send the assistant to it, whatever your default and conditions say. Use it for the call that belongs with a client rather than in your usual pile.
- Select Meeting in the Quick Actions panel on the dashboard, or Capture Live Meeting on the Meeting Assistant page. The Schedule Meeting dialog opens.
- Stay on Join Now to send the assistant straight away, or select Schedule to set a date and time.
- Paste the meeting link into Meeting URL.
- Set Folder to the destination you want. It starts on the first folder in your library, so change it unless that is already the right one.
- Submit the dialog.
To change the folder on a meeting you already scheduled, reopen it from the Meeting Assistant page. The dialog opens as Edit Scheduled Meeting with the same Folder field, and Update Meeting saves it.
This works the same whether or not you have live transcription turned on.
Which folder a recording lands in
Speak checks three places in order and stops at the first one that names a folder:
- The Folder you picked on that meeting.
- The first matching Event Title condition on the Meeting Routing to Folder tab.
- Your Default Folder on the same tab.
So a per-meeting choice always beats a condition, and a condition always beats the default. If none of the three names a folder, the recording lands in the first folder in your library.
Only a meeting you send the assistant to yourself carries a folder of its own. A meeting the assistant joins from your calendar on its own has none, so it follows your conditions and your default.
Want a hand setting this up? Book a free consult and we’ll do it together on your account.
Related: Meeting Assistant · Auto-join