Permissions live on the folder, and every file inside inherits them. Give a group access to a folder once and each recording you add lands under the same rules, so sensitive material stays restricted while shared work stays open to the people who need it. Manage members and groups from Team.
Build a user group
Folder access runs on user groups, not on people picked one at a time. Open Team, switch to the User Groups tab and click Create User Group. Give the group a name, add the members you want, and save it. You can come back and change the members later from Edit Group, and every folder that group is assigned to follows the change.
Give a group access to a folder
- Open Folders in the left sidebar.
- Click the three-dot menu next to the folder and select Edit.
- Pick the groups you want from the Assign To list.
- Click Save.
You get the same Assign To list when you create a folder, so you can set access up front and still change it whenever you need to. Anything already in the folder picks up the change, and so does anything you add later. Remove a group and its members lose access to everything in that folder straight away.
Assign To shows up only on a team workspace, and only when your own permissions include assigning folders.
Change access for a single file
There is no per-file access list. A file inherits access from the folder it sits in, so to change who can see one recording, move it into a folder assigned to the right groups. Select the file in its folder, open the actions menu and choose Move to Folder. Keep sensitive recordings in their own folder rather than trying to manage access file by file.
Set what a member can do
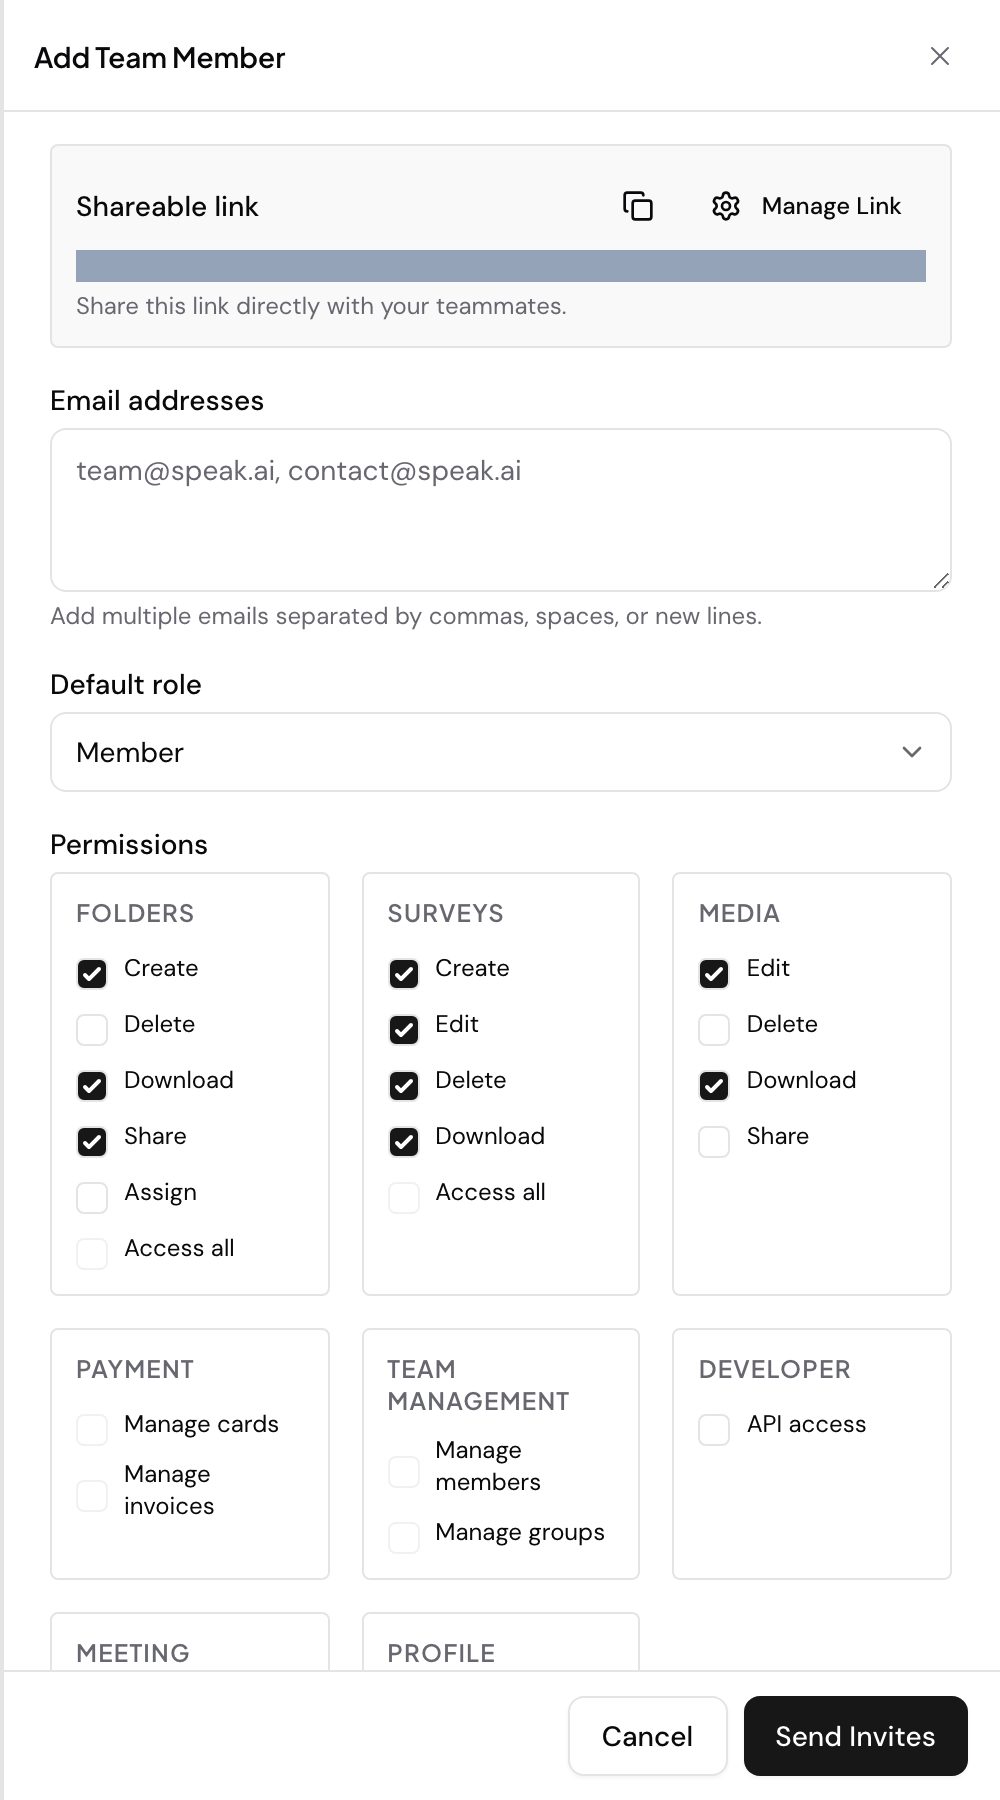
Roles and permissions sit on the member, not on the folder. Go to Team, click Invite Members, and pick a Default role of Admin or Member. The Permissions grid underneath turns individual capabilities on and off, grouped by area: Folders, Surveys, Media, Payment, Team management and Developer, with Meeting Assistant and Profile settings below.
Under Folders you control Create, Delete, Download, Share and Assign separately. Access all is the one to watch: it hands someone every folder in the workspace regardless of which groups they belong to.
When a team member cannot see a file
Check two things. First, whether the file moved into a folder they do not have access to. Second, whether they were removed from the group that folder is shared with. Both take effect immediately, so a file that was visible yesterday can disappear from their view without any change to the file itself.
Evaluating Speak AI for a team? Book a demo and see your own recordings analyzed.
Related: Teams