
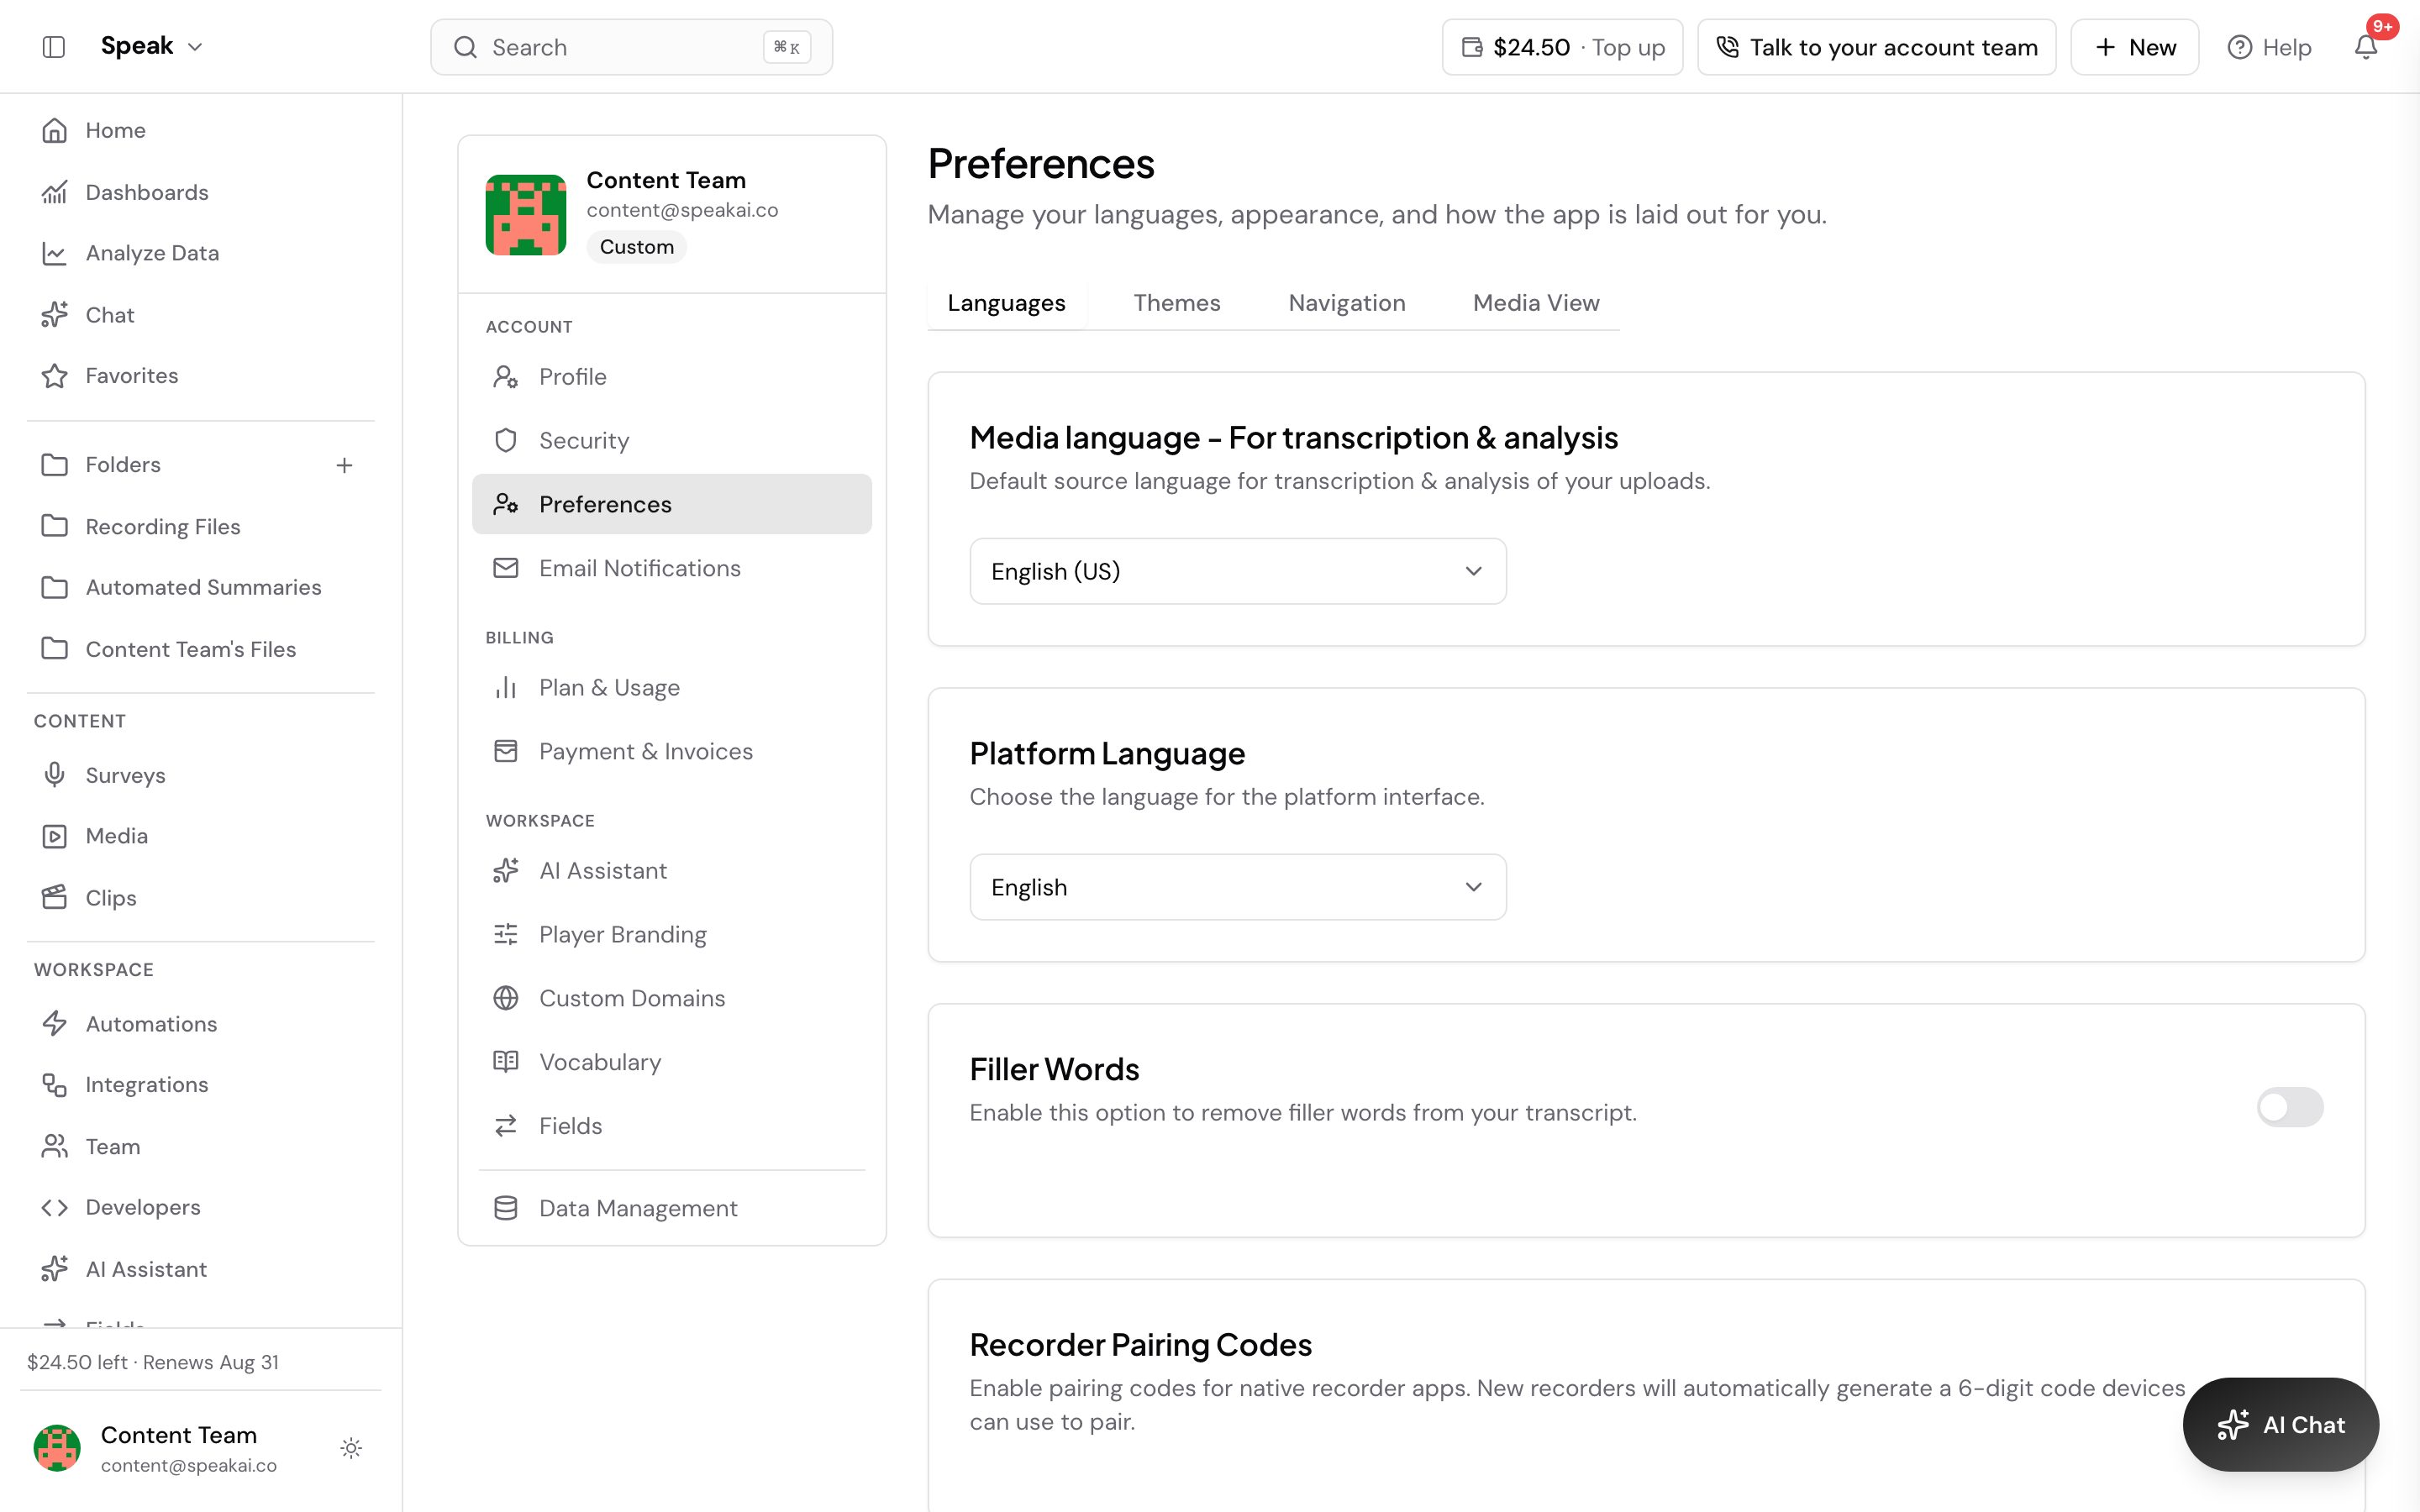
Preferences holds the settings that change how Speak AI looks and behaves for you. It has four tabs: Languages, Themes, Navigation and Media View. Everything here is personal to your login, so changing it never changes what a teammate sees, unless you deliberately save it as a team default.
Open Preferences
Preferences lives in the account menu at the bottom of the sidebar.
- Select your avatar or name at the bottom of the sidebar.
- Choose Preferences.
You can also go straight to app.speakai.co/profile/preferences. Each tab keeps its own address, so a link you paste to a teammate reopens on the same tab.
Set your languages
The Languages tab controls the language Speak AI transcribes in and the language the interface is drawn in. They are separate settings and they do not have to match.
- Media Language is the default source language for transcription and analysis of your uploads. Set it if you mostly work in one language, so new uploads stop relying on auto-detection. See transcription troubleshooting for the other two ways to control language on a file.
- Platform Language is the language of the interface itself.
- Filler Words Detection tracks words like “um” and “uh” in your transcripts. Turn it on and edit the word list, then save.
- Recorder Pairing Codes gives every new recorder a code a device can pair with. See pairing codes.
Choose a theme
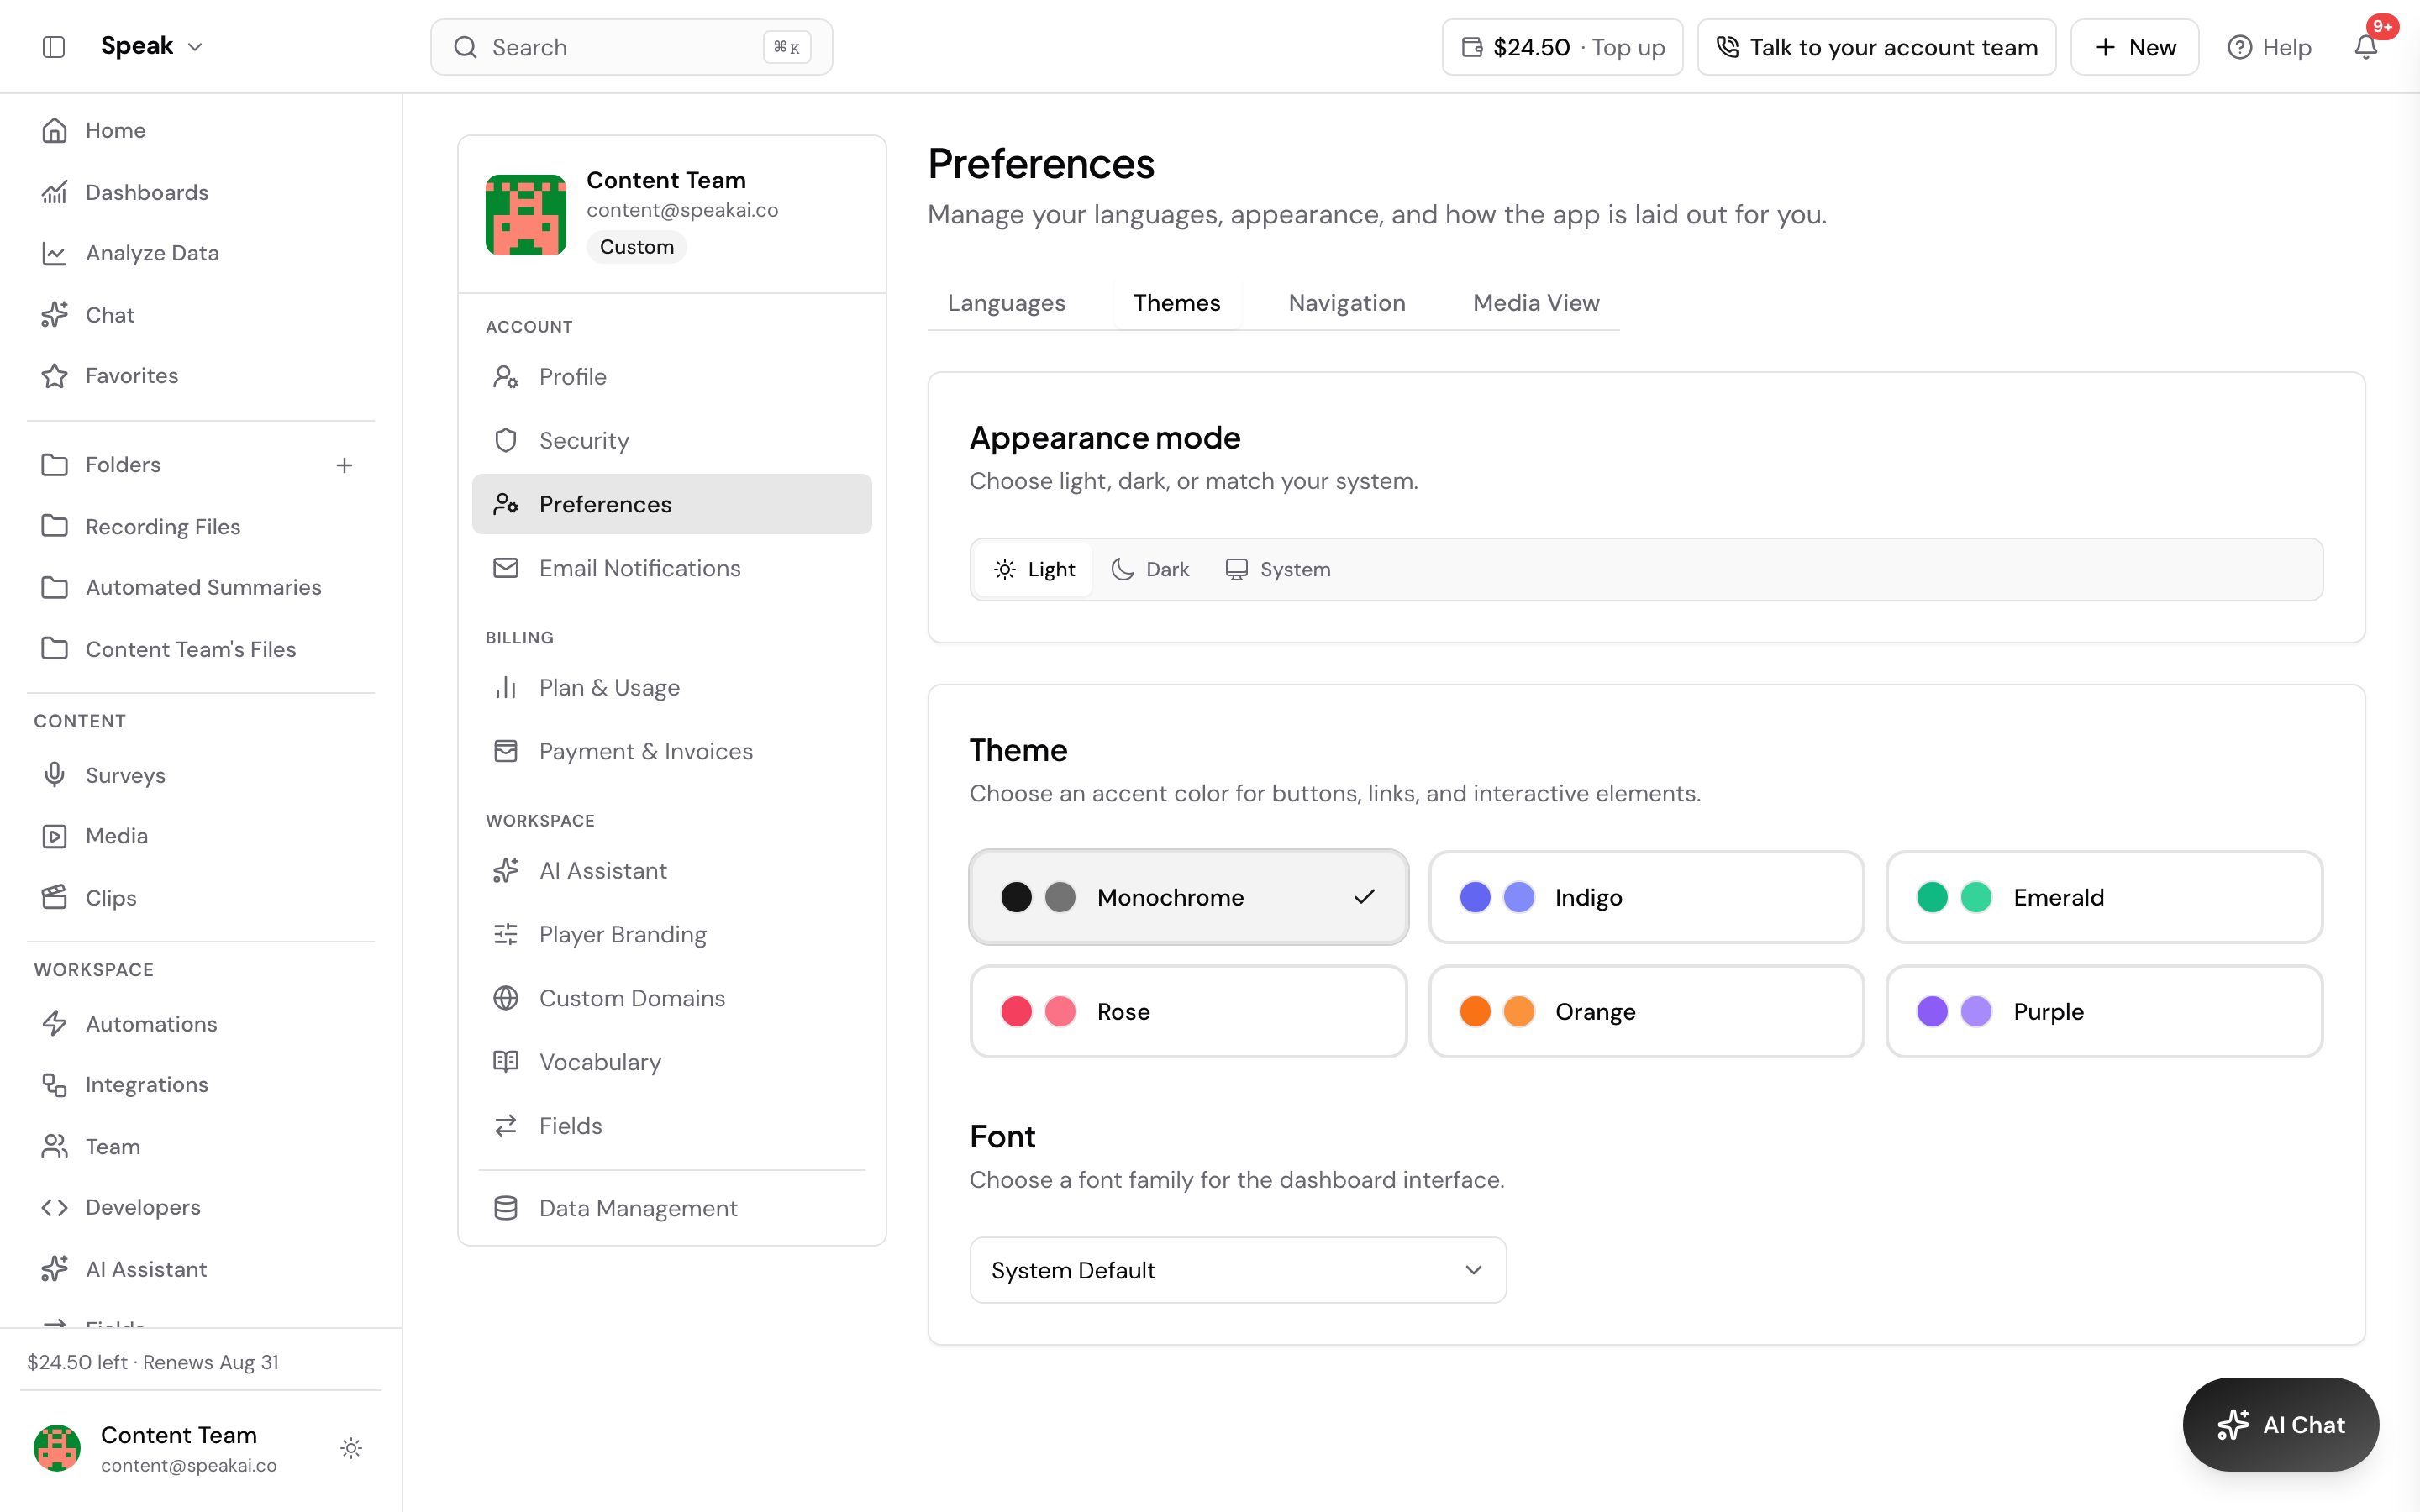
The Themes tab sets light and dark mode and the accent color of the interface.
- Appearance mode picks light, dark, or matching your system.
- Theme picks the accent color used for buttons, links and interactive elements.
- Font picks the font family for the interface.
Reorder or hide sidebar items
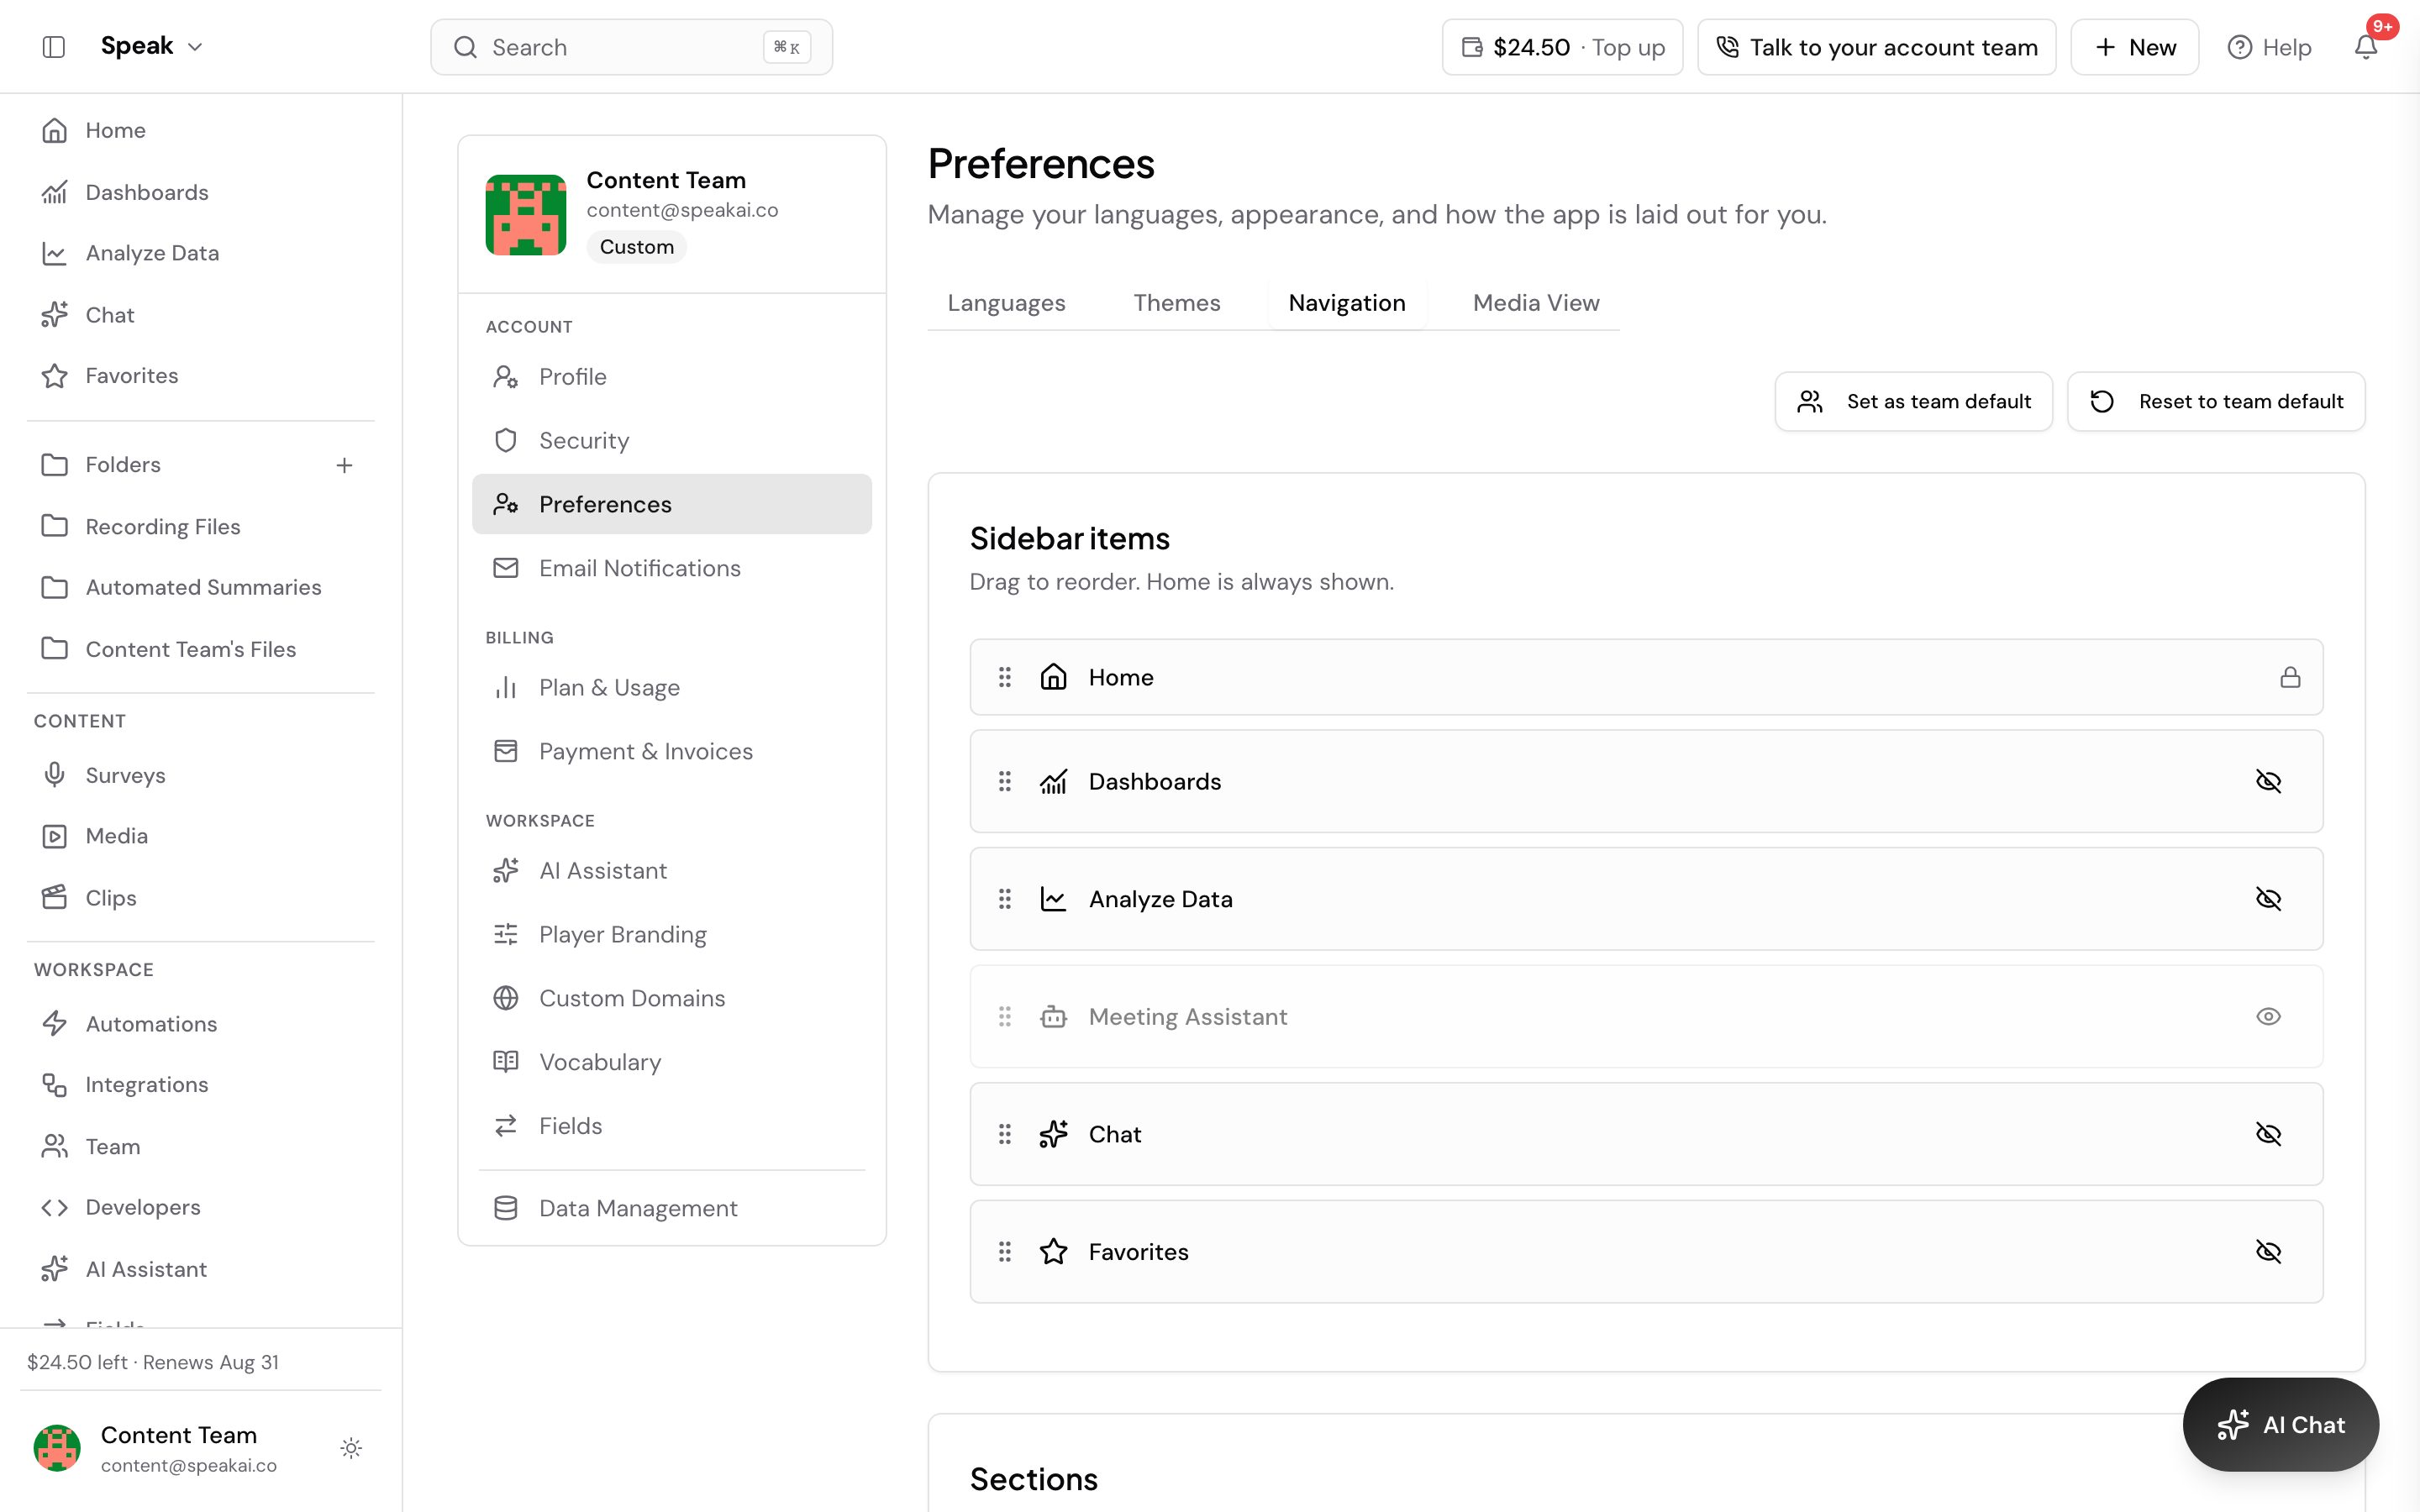
The Navigation tab rearranges the sidebar so the things you use sit at the top and the things you never open are out of the way.
- Open the Navigation tab.
- Drag any row in Sidebar items by its handle to move it.
- Select the eye icon on a row to hide it. Select it again to bring the row back.
Home can be reordered but never hidden, so it carries a lock instead of the eye icon. The Sections card below does the same for the two groups the sidebar is divided into, Content and Workspace: drag a section to reorder it, hide a section you do not use, or drag items within it.
The editor only lists items you can actually reach. Anything your role, permissions or plan does not give you is left out rather than shown and then blocked.
To undo everything, select Reset to default.
Set how a media file opens
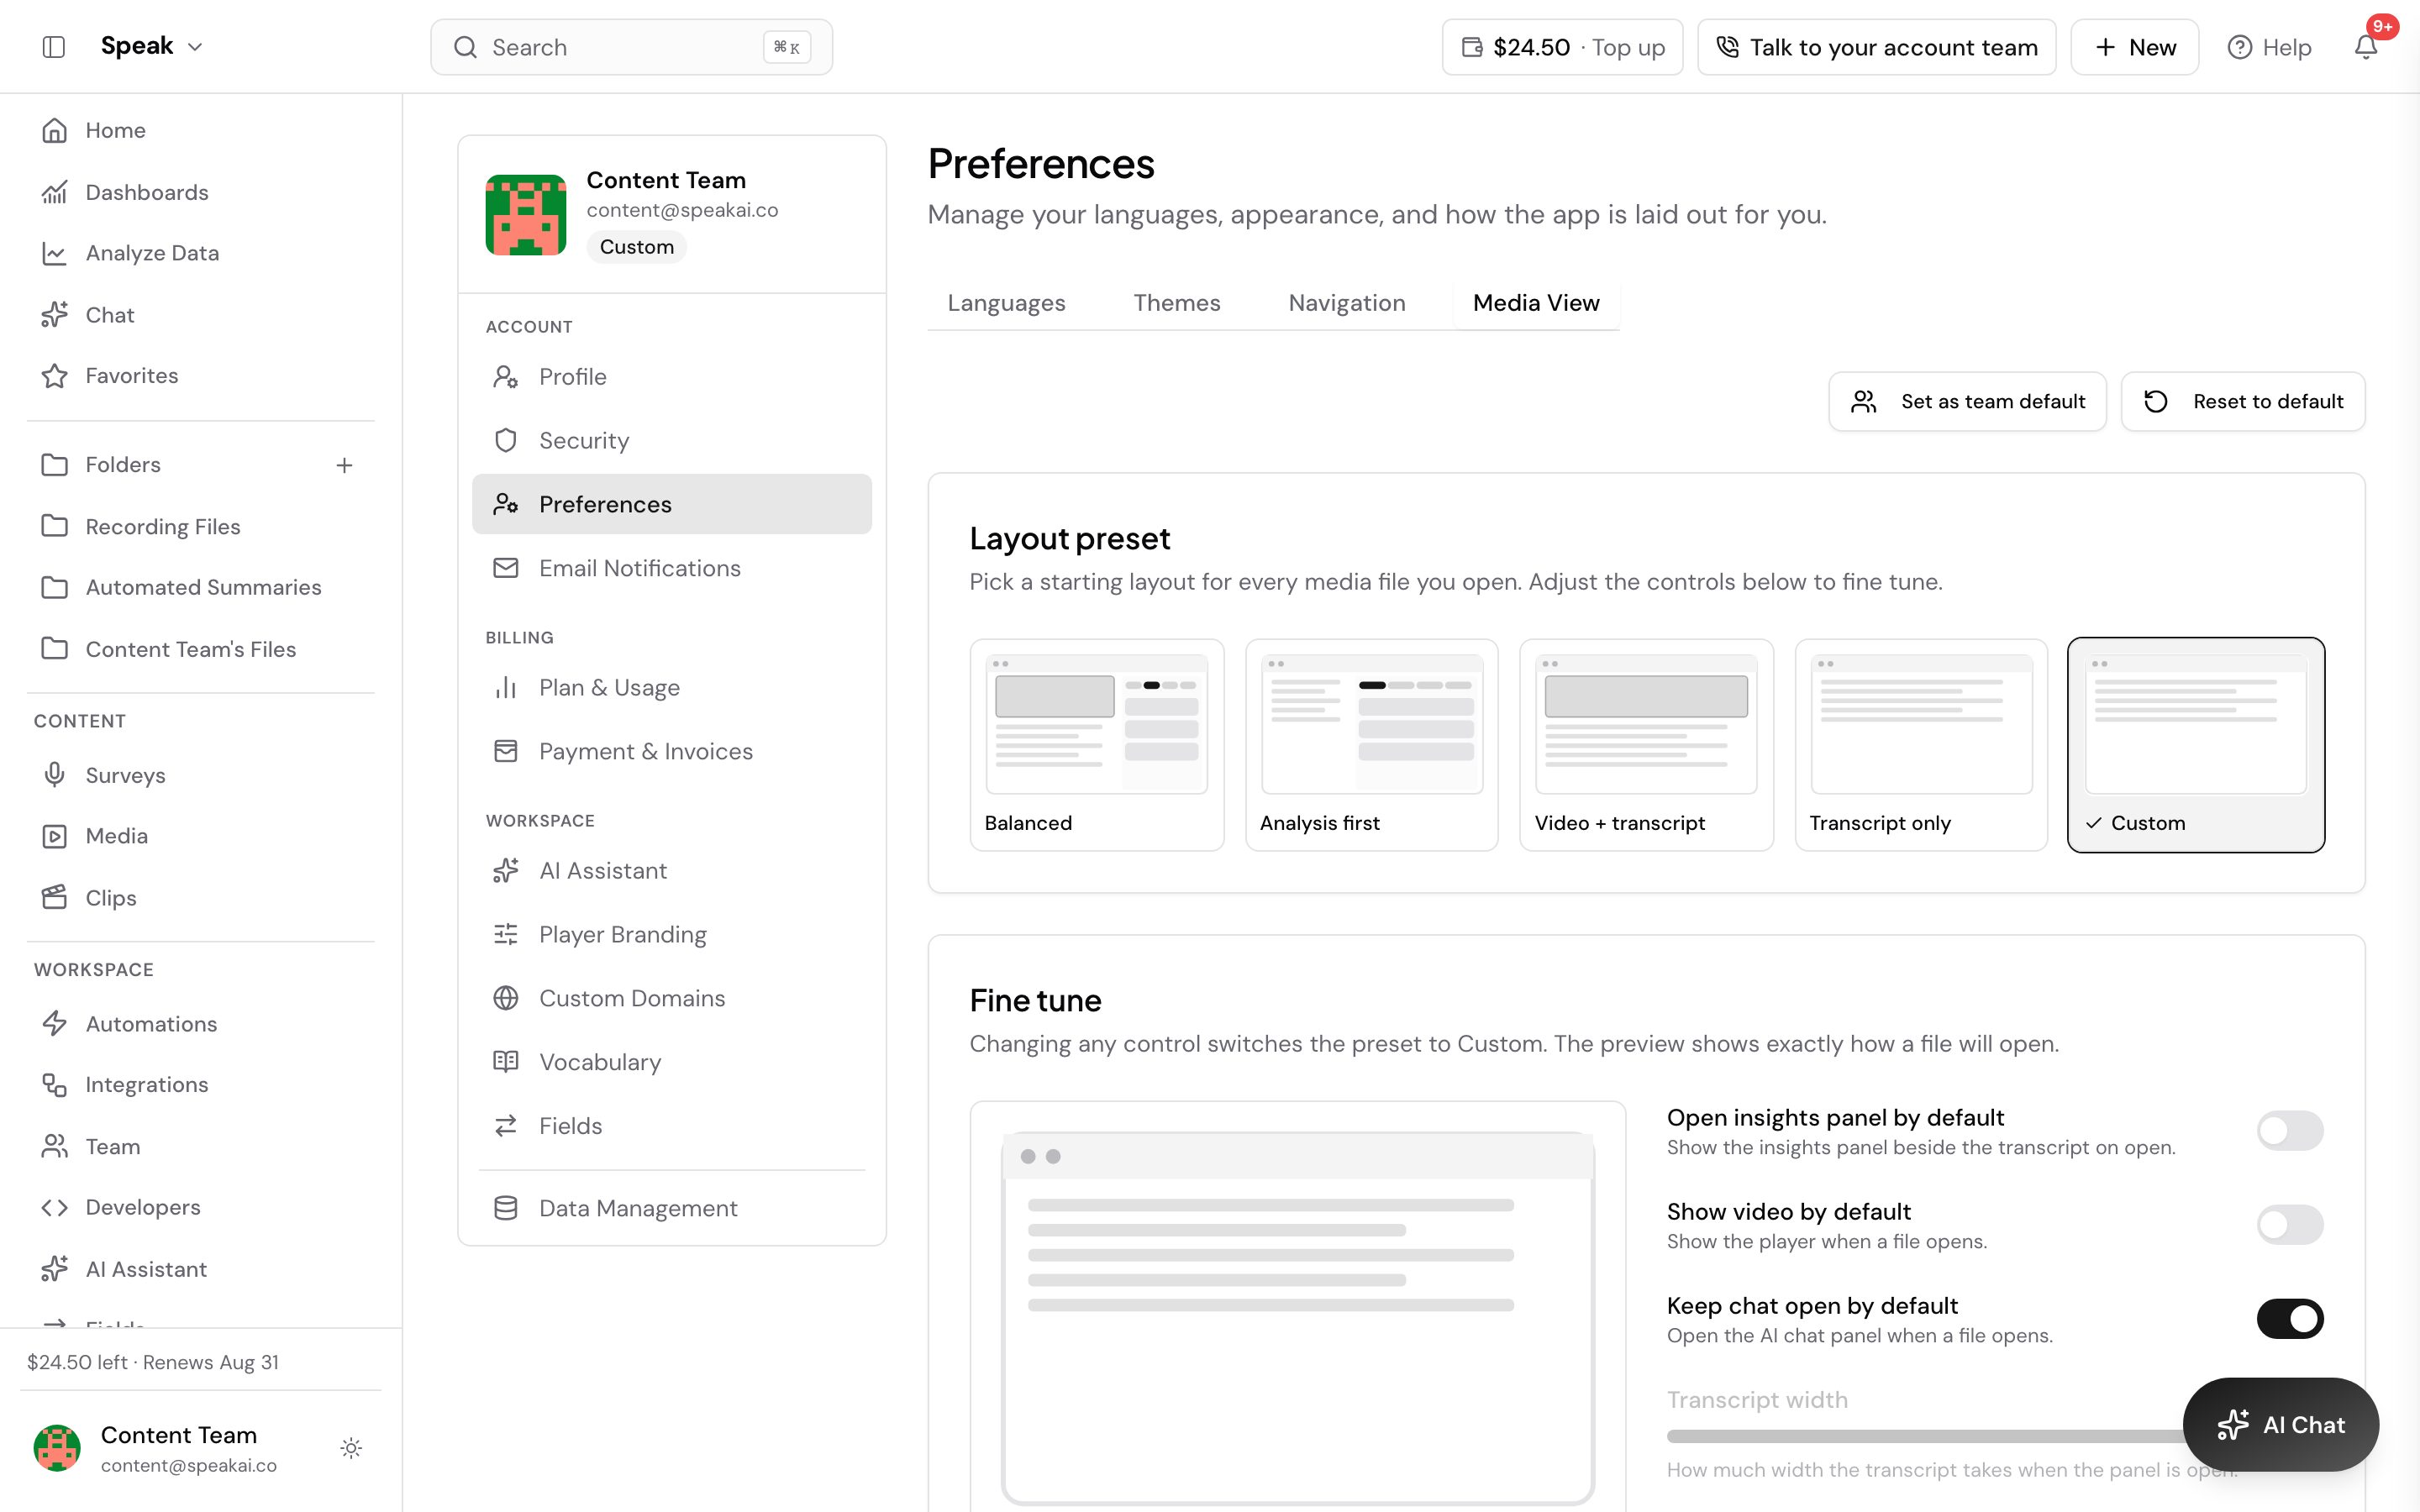
The Media View tab decides what you see the moment you open a file, so you do not rearrange the same panels on every recording.
Start from a Layout preset:
| Preset | What you get |
|---|---|
| Balanced | The insights panel opens beside the transcript, with the player showing |
| Analysis first | The insights panel opens on the Insights tab and the player stays hidden |
| Video + transcript | The player and transcript only, with the insights panel closed |
| Transcript only | A wide transcript, with the player and the insights panel closed |
Then adjust anything you want under Fine tune. Changing any control switches the preset to Custom, and a preview shows how a file will open.
- Open insights panel by default shows the insights panel beside the transcript.
- Show video by default shows the player when a file opens.
- Keep chat open by default opens the AI chat panel when a file opens.
- Highlight low-confidence transcription tints the passages the transcriber was unsure of, so you can check them against the audio. See Accuracy for what the levels mean.
- Show labels on the transcript draws labels on the transcript when a file opens. Turn it off to start with labels hidden.
- Transcript width sets how much width the transcript takes when the panel is open. It applies only while the panel opens by default.
Panel width and auto-open apply on wide screens. On phones and tablets the insights open as tabs instead.
Reorder the insight tabs
The Insight tabs list at the bottom of Media View sets the order the tabs appear in on every file.
Drag a row to move it, select Set default to pick which tab opens first, and hide the ones you do not use. Tabs that are unavailable on a given file are skipped rather than shown empty, so a file still processing shows fewer tabs than a finished one.
Change the layout while a file is open
The Layout menu on an open media file changes that file’s layout without going back to Preferences.
Open Layout in the media header and switch Insights panel, Show video or AI chat panel. Select Save as my default to keep the arrangement for every file you open next, or More layout settings to jump to the Media View tab.
The menu appears once a file has finished processing. On a file that is still transcribing there is nothing to lay out yet, so the control is absent.
Save a layout as your team default
Anyone who can manage team members can publish their own navigation or media layout as the starting point for everyone in the workspace.
Set the tab up the way you want it, then select Set as team default. The button appears only for accounts that can manage team members, so a member without that permission never sees it. See team permissions.
A teammate who has never changed the tab themselves follows the team default and sees a Following your team default badge. Once they change anything, their own choice wins and the badge goes. Their reset button then reads Reset to team default, which puts them back on what you published rather than on the Speak AI default.
Does hiding a sidebar item turn the feature off?
No. Hiding an item only removes it from your sidebar. The feature keeps working, the page is still reachable by its address, and anything scheduled or automated keeps running. Show the item again at any time from the Navigation tab.
Why is an item missing from the Navigation tab?
The Navigation tab lists only the items your account can open. An item tied to a permission you do not hold, or to a feature your plan does not include, is left out of the editor entirely, so there is nothing to reorder or hide.
Do my preferences follow me to another device?
Most of them do. Your sidebar order, your media layout, your accent theme and your font save to your account, so they apply wherever you sign in. Appearance mode is the exception: light, dark and system are remembered by the browser you set them in, so pick it again on a new device.
Want a hand setting this up? Book a free consult and we’ll do it together on your account.
Related: Account · Pairing codes · Transcription troubleshooting · Team permissions